Technology is a prerequisite in today’s world and Windows is a very essential enabler. It keeps us in touch with the world while giving us the comfort of doing every task at the click of a button.
Table of Contents
With its regular updates and added features and the launch of new versions, Windows has become one of the most famously used platforms by most people.
Windows 10 is one such latest version that is loved by all for all their daily and essential work.
But, as amazing and fast as it is with added benefits, qualities, and skills it also comes with certain difficulties and flaws.
One such common error?
KMode Exception Not Handled!
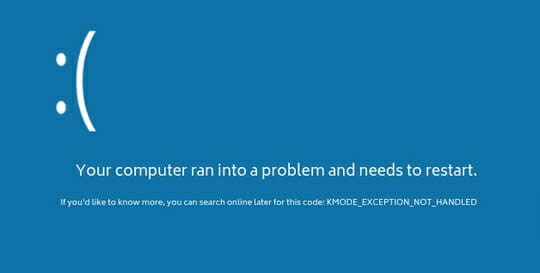
This error is basically a simple error in Windows 10 wherein you see a blue screen on your device due to a faulty driver.
This leads your computer to restart when the error appears again, causing it to restart again, and so on.
Also see: Fix DNS_PROBE_FINISHED_NXDOMAIN Error
While it’s agitating and frustrating, Lucky for you, you don’t need a computer expert to solve this.
You can follow some easy steps and resolve the issue yourself thereby, getting back to your task at hand.

Wondering what they are?
Here goes –
1- Disabling Fast Start-up
It’s the quick fix. A few simple steps and your device is back to normal.
- Open the ‘control panel’ of your device.
- Find the option that states, ‘System and security. Access that.
- Find the power options in that window and click on them.
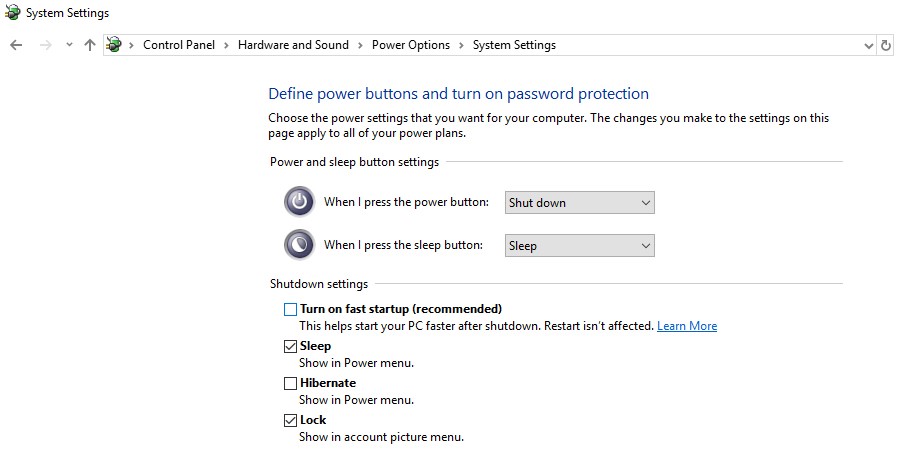
- Now, after finding the power options, find the option that states, ‘Choose what power buttons do‘.
- After accessing that you will come across an option to change settings that are currently implied.
- In those options, find the option that reads turn on fast start-up and disable it by unchecking the box.
- After you’re done will all of these steps make sure to save the changes and close the control panel?
This step will most probably easily fix the issue that you’re facing but on the off chance that it still persists, you can opt for some other easy ways to resolve it.

2- Fix Driver Issues by updating them
Old drivers with older features and versions might result in errors and devices not being able to start up properly thus causing the KMode Exception Not Handled error.
Thus, updating the said drivers can help resolve this issue.
Important – Do not forget to put your device in safe mode before starting the updating process.
It’s also important to find exactly which drivers are causing an issue but don’t worry! While the BSOD screen appears, windows give a clue as to which driver might have the issue.
The screen comes up with a notification, “Error: Kmode_Exception_Not_Handled,” which is followed by the name of the culprit drive-in brackets.
Now to reboot the system, the easiest way to go about it is by interrupting the process three times.
This process involves you pressing the power off button for about 3-4 seconds to turn the device off in the middle of the booting-up process.
Also see: ERR_SPDY_PROTOCOL_ERROR [Fixed]
During the fourth time, the device will start to repair itself. In this choose the advanced options visible on the screen and then troubleshoot.
In the start-up settings from the advanced options, press 4 on your keyboard and restart the device.
During the process of restart press 4 again and the device will start in safe mode.
From there all you need to do is –
- Click on ‘Window key +X’ which will lead the context menu to pop up.
- Choose the device manager from it.
- Find Other devices in the device manager.
- Find the corresponding drive or look into unknown devices if no drive is available.
- Right-click on that option and then click on Update Driver software.
- Wait!
- As soon as the drivers are fully updated, restart your system.
This particular method is comparatively longer and more complex than the earlier method but this should effectively resolve all your issues in your device related to the KMode Exception Not Handled error.

3- Run Memory Diagnostic test
If after both the above-mentioned methods somehow, your device is still facing problems then the issue just might be a little more serious than expected.
There could be an issue with the hardware of the device causing continuous errors thus, evidencing a problem with the RAM.
In order to figure that out, you will need to run a Memory diagnostic test. The SFC scan is one way to do so.
It will help the Windows system to find out the underlying problem and will try to repair it by inspecting each and every file in the system and checking its working conditions, which might help you to get rid of the error on a permanent basis.
The steps that you need to follow to do this are as follows –
- Press the ‘Windows key +R’ and open the Command Prompt on your device. Then type ‘cmd’ in the box that will pop up right after that. This can also be alternatively done by just pressing the Windows key and typing ‘cmd’ in the search box.
- Type in the command, ‘SFC’scannow‘
- Press enter & Wait!
- Make sure the process gets finished. Since it’s a long one you need to have a bit of patience.
- Once it’s done, restart your device.
Hopefully, after doing this your RAM will be cured and all will be good with your device and you can go back to doing your work in peace.
But unfortunately, if it doesn’t it might just be the time to consult the experts or a whole new kit.

