
Often we take screenshots of important things on a Mac that we believe will be needed later and save them.
Table of Contents
However, if you want to cut the unwanted area of the screenshot, you must know how to crop a screenshot on a Mac.
This is exactly what you are going to learn in this article today. We will discuss several different methods to crop a screenshot on a Mac.
Sometimes it happens that we can not always share the exact screenshot that we have captured.
It needs to be cropped so that the sensitive information is not passed to the other person.
For example, if you have taken a whole window screenshot of your bank account transactions and you need to send a particular transaction detail to someone, you’ll be required to crop the screenshot as it may show all the sensitive information such as user ID, ins & out of the payments if you don’t crop, which is not good.
There could be other instances when you have to crop a screenshot on a Mac.
So, whatever your reason, go through this article if you want to learn how to crop a screenshot on a Mac.
#1- How to Take a Screenshot on Mac using Keyboard
There are several methods to take a screenshot on a Mac, and I’m going to discuss some of the quickest ones.
To be precise, here are the keyboard shortcuts to quickly take a screenshot on your Mac.
- Screenshot of the Whole Window: Press Shift + Command + 3.
- Screenshot of part of the Window: Press Shift + Command+ 4 (It will activate crosshair and you can adjust the area to be captured).
- Screenshot of Menu/Window: Press Shift + Command + 4 + Spacebar.
- To open the Toolbar for taking a screenshot of the selected region: Press Shift + Command + 5.
#2- How to Take a Screenshot on Mac using Chrome Extension
This is yet another great method to take a screenshot on a Mac. With this Chrome extension installed in your browser, you can take screenshots of the whole window, the whole page (no matter how long the page is), or the selected area.
With just one click, this extension is able to take screenshots of the visible part as well.
Here is how to take a screenshot on a Mac using the Chrome extension:
Step 1- Open Chrome browser and Search for “Chrome web store” in Google. Click here if you want to go to the store directly.
Step 2- Search for “Awesome ChatGPT Screenshot” and the extension will show in the result.
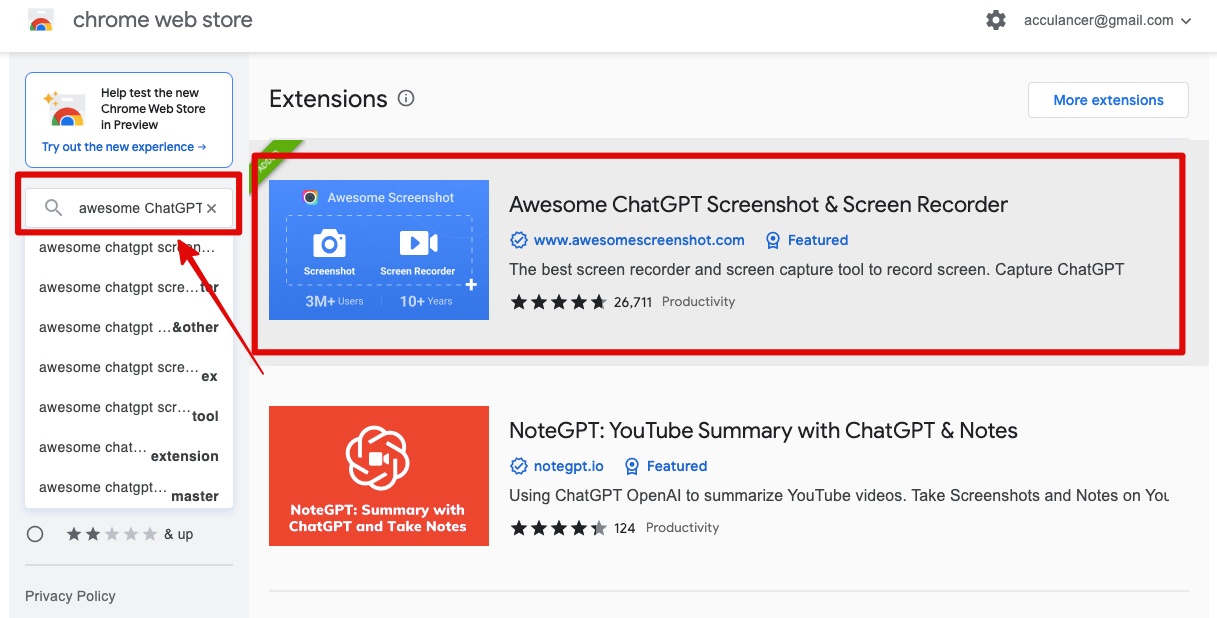
Step 3- Click the extension and then install it in the Chrome browser. Check the address bar for confirmation.
Step 4- Go to the webpage you want to take a screenshot of.
Step 5- Click the Awesome Screenshot extension and it will present several options such as “Visible Part“, “Full Page“, “Selected Area” etc.
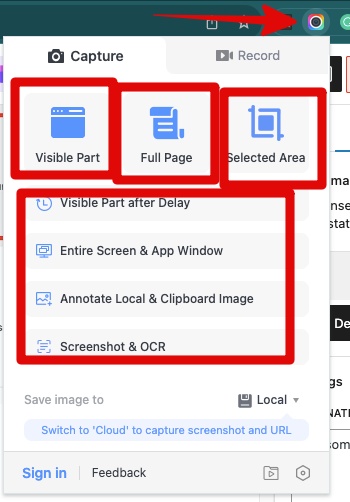
Step 6- Choose the appropriate option and the extension will take the screenshot and open it in a new tab.
Step 7- You can edit the screenshot using options like crop, highlight, blur, etc.

Step 8- The final screenshot can be downloaded, converted to PDF, copied, and printed directly.
#3- How to Take a Screenshot on Mac using the Photoscape App
The above method will work for taking screenshots of the web pages. If you want to take a screenshot of the desktop or Mac settings that you have currently opened, the Photoscape app comes in handy.
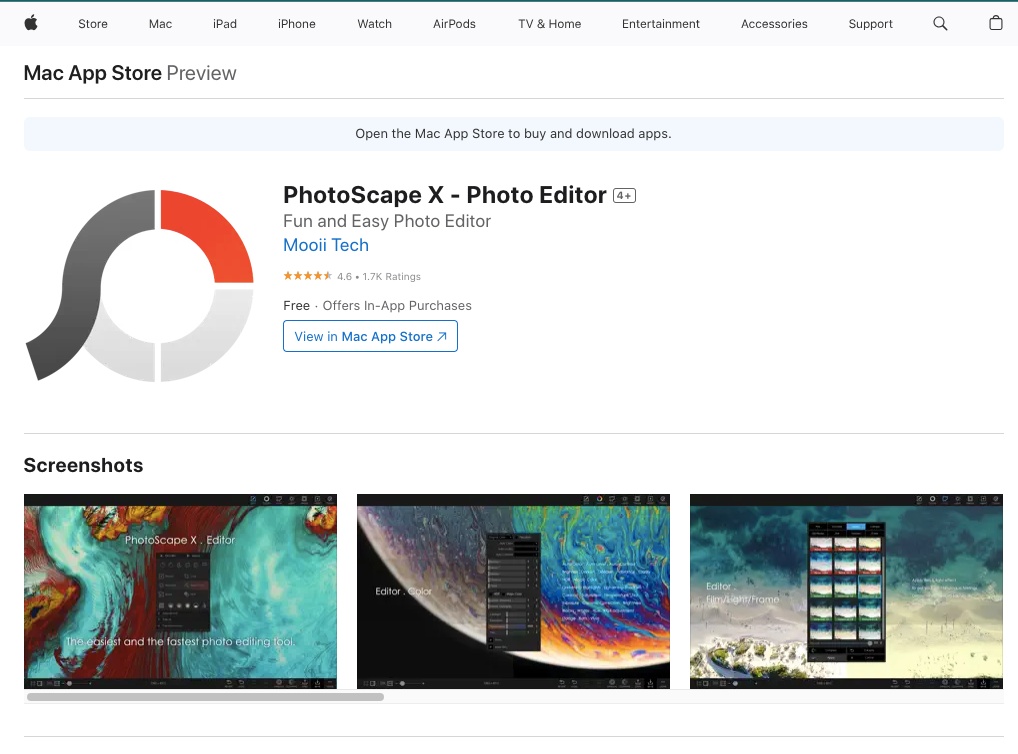
The app is free for life and has several options for editing a screenshot. This app is a lightweight app and is available on Apple Play Store.
Here is the process.
Step 1- Go to the Apple Play Store and search for the “Photoscape X” app or Click here to go to the download page directly.
Step 2- Open the app in iTunes and download and install it on your Mac.
Step 3- Go to “Tools” from the top menu and select “screen capture”
Step 4- It will open a small window asking you to choose an appropriate option.
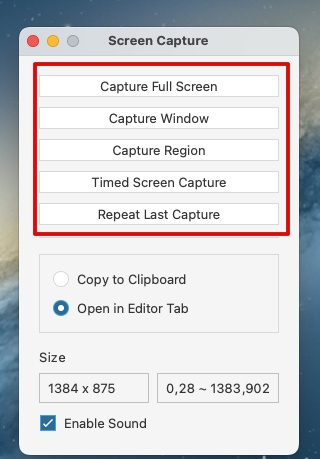
Step 5- Select an option and you will be able to take a screenshot on a Mac of the selected area or whole window based on the selected option.
Step 6- The screenshot taken will then open in the Photoscape X app which is an editor as well with plenty of options to edit your screenshot.
The all above screenshots are taken and edited with the Photoscape app only.
How to Crop Screenshots On Mac
There could be many workarounds to crop a screenshot on a Mac but we will be discussing only the most common ones.
You can crop the screenshot using built-in apps or by using third-party apps.
The built-in cropping tool is the most reliable and convenient way however if you want to use any third-party app, I’d recommend getting trusted apps (don’t worry, I’ll mention them in this post).
#1- Crop Screenshot With Built-in Cropping Tool
The built-in tool is the most common and preferred way to crop a screenshot on a Mac.
You can crop the screenshot immediately after the screenshot is captured by using this method.
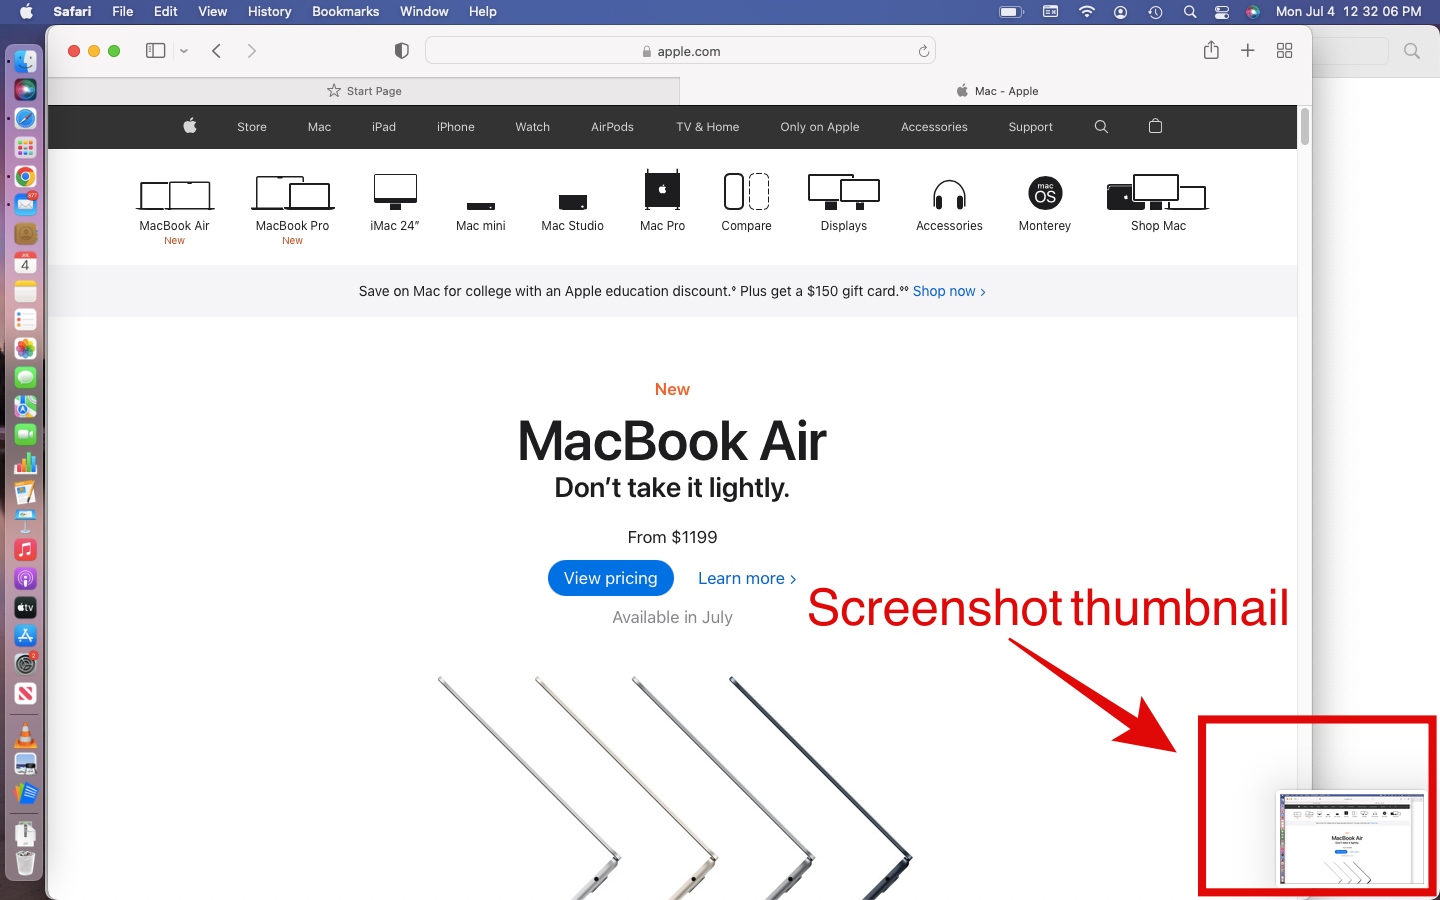
When you press the shortcut keys to take the screenshot that we have mentioned above, you’ll notice a screenshot is captured and the thumbnail of the same is floating at the bottom right corner of your Mac screen.
Click the thumbnail immediately after the screenshot is taken as it remains available for just a few seconds because once the thumbnail is gone, it will not appear back.
Unfortunately, the time duration can not be increased as well.
Then you’ll have to use the other method that we have discussed below.
Here are the steps to crop a screenshot on a Mac:
Step 1- Get the screen you want to take a screenshot of.
Step 2- Press Shift+Command+3 if you want to capture the whole screen.
Step 3- The thumbnail of the screenshot will appear for a few seconds at the bottom right corner of the screen as depicted in the below screenshot. Click the thumbnail quickly as it will go away in a few seconds.
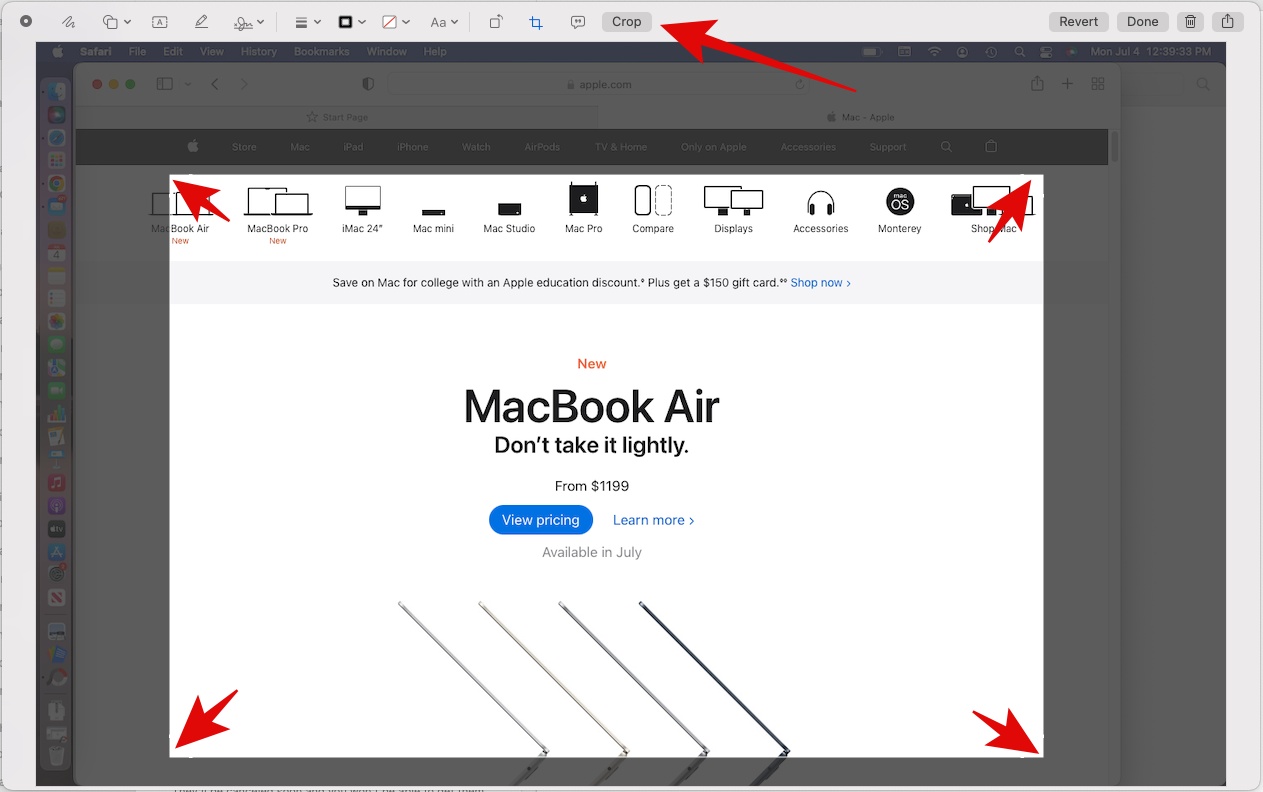
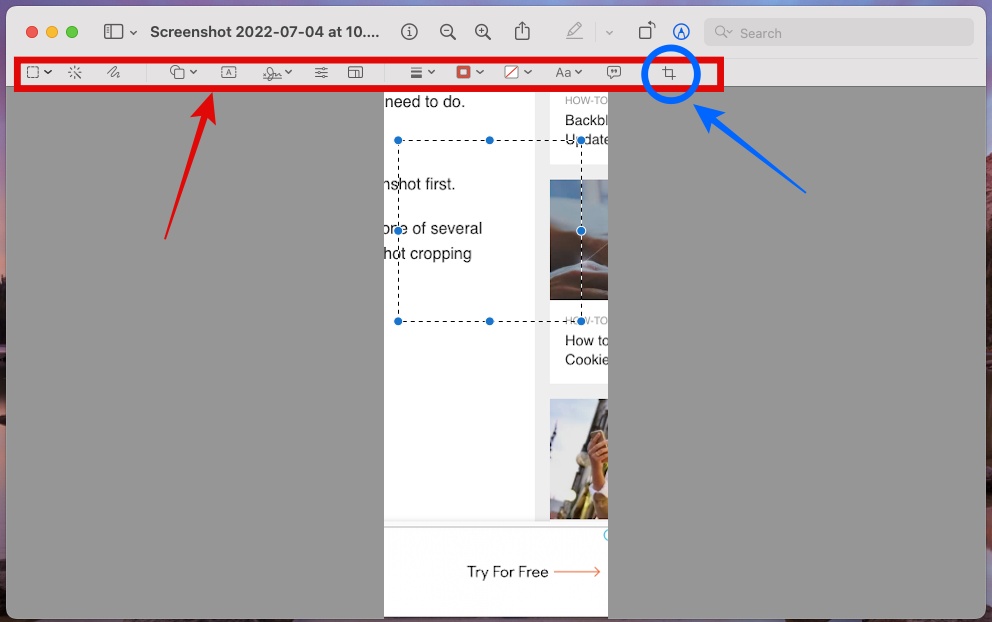
Step 4- It will open the screenshot in the built-in cropping tool. Look for the crop icon in the top menu and click it. It will highlight the screenshot.
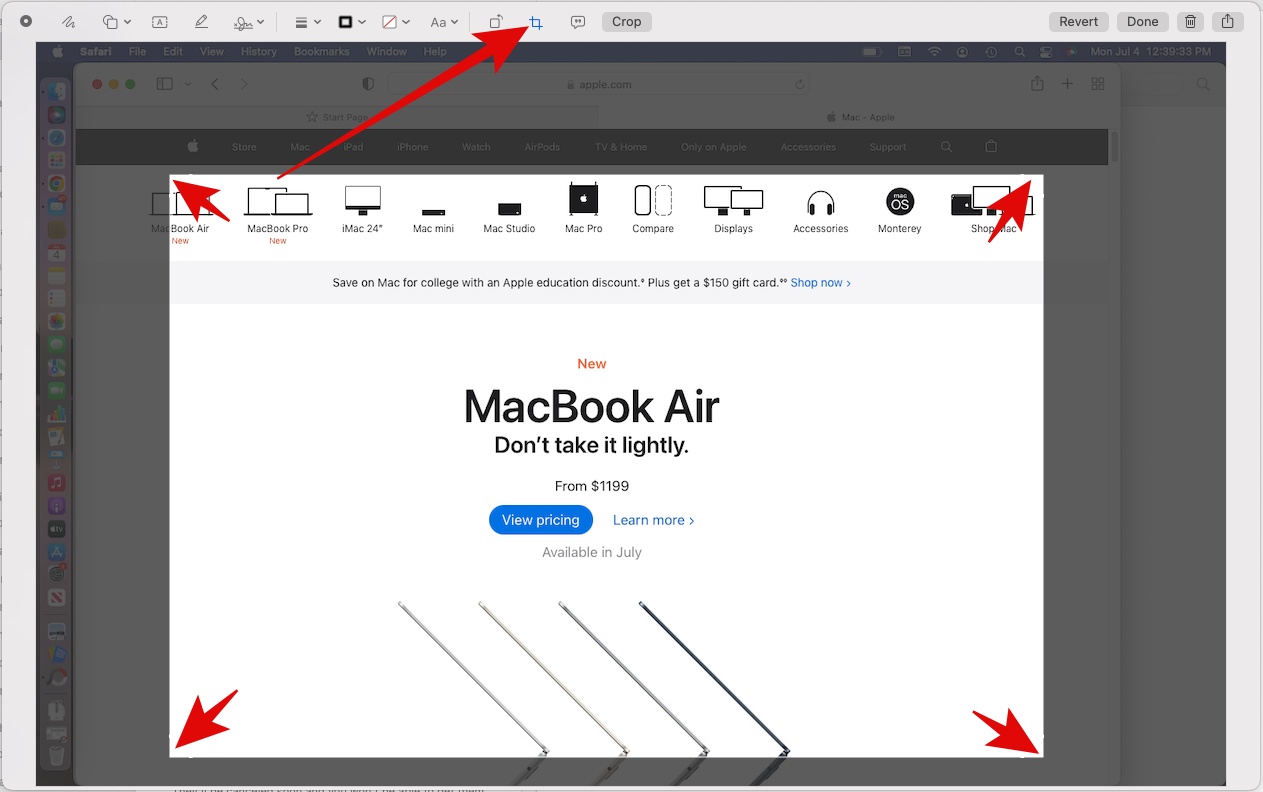
Step 5- Drag the corners to select the area and click the “Crop” button.
#2- Crop Screenshot With Built-in Photos App
If you have missed clicking the thumbnail immediately & it has gone, you can use the Photos app to crop the screenshot.
The Photos app on Mac is a built-in photo editing app that does more than simple crop.
This is a slightly longer process but very simple.
However, the benefit here is, not just it will not only allow you to crop the screenshot, but you can also perform basic photo editing as well.
So if your requirement is not just cropping but adding filters or adjusting light/color/noise etc, you should straightaway use this method, not the one discussed above.
Here is how to use the Photos App on Mac to crop a screenshot.
Step 1- Get the Window that you want to capture.
Step 2- Press Shift + Command + 3 altogether. It will save the screenshot on the desktop with the file name in the format “Screenshot year-month-day at time PM“.
Step 3- Go to Menu and Click on “Import“

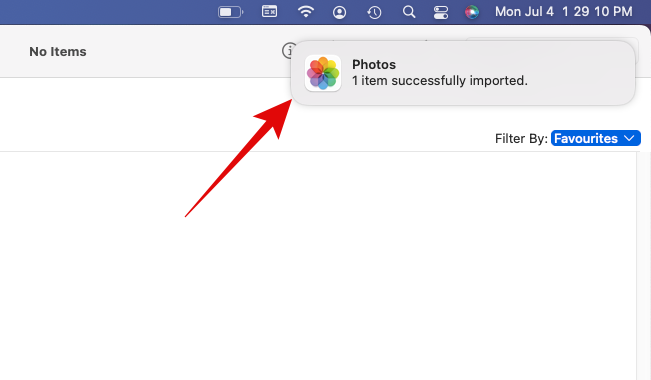
Step 4- Select the screenshot you want to crop and click import. You’ll receive a notification when the import is done.
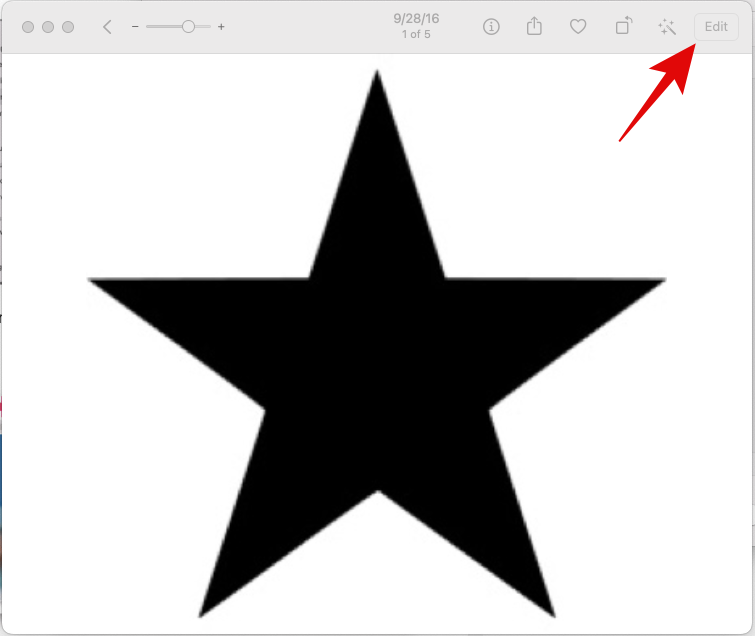
Step 5- Double-tap the screenshot you just imported. Then, click “edit” and the image will be opened in the editor.
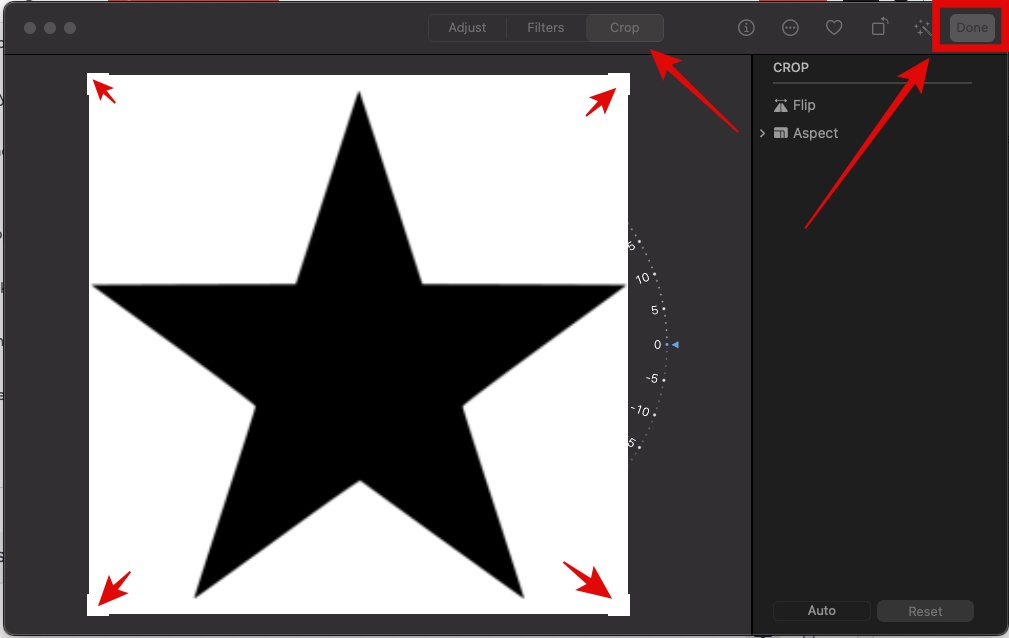
Step 6- Select “Crop” from the three options from the top menu. It will highlight the screenshot giving you the option to adjust the area.
Step 7- When the area is selected, click the “Done” button.
#3- Crop A Screenshot With Built-in Preview App
Some people find this option very convenient, as to crop a screenshot, you just have to click it. You’ll then have the option to crop.
When you double-click the screenshot, it opens up on the Preview App.
The Preview app is a default built-in app on Mac and it is used for basic editing tasks such as adding text, drawing lines/arrows, resizing images, cropping, etc.
To crop a screenshot on a Mac using the Preview app, follow these simple steps:
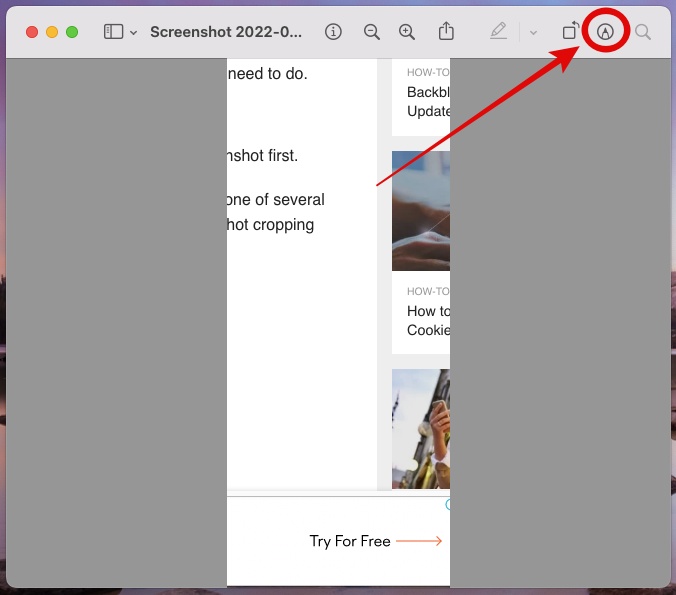
Step 1- Double-click the screenshot you want to crop. It will open the screenshot in the preview app.
Step 2- Click the “Markup Toolbar” option. It will open more editing options for you.
Step 3- Select the area you want to crop. Once done, it will highlight the “Crop” option.
Step 4- Click the Crop button and you are done with cropping a screenshot on a mac.
#4- Crop A Screenshot Using Third-Party App
There are plenty of apps that you can download from the App store to crop a screenshot on a Mac.
For the sake of this tutorial, we are going to use one of the most popular photo editing apps – Polarr.
You can download this app from the app store for free.
The other reliable photo editing app is Adobe Lightroom and Picktorial.
Follow these steps to crop a screenshot on a Mac using the third-party app- Polarr!
Step:1- Right-click the screenshot that you want to crop.
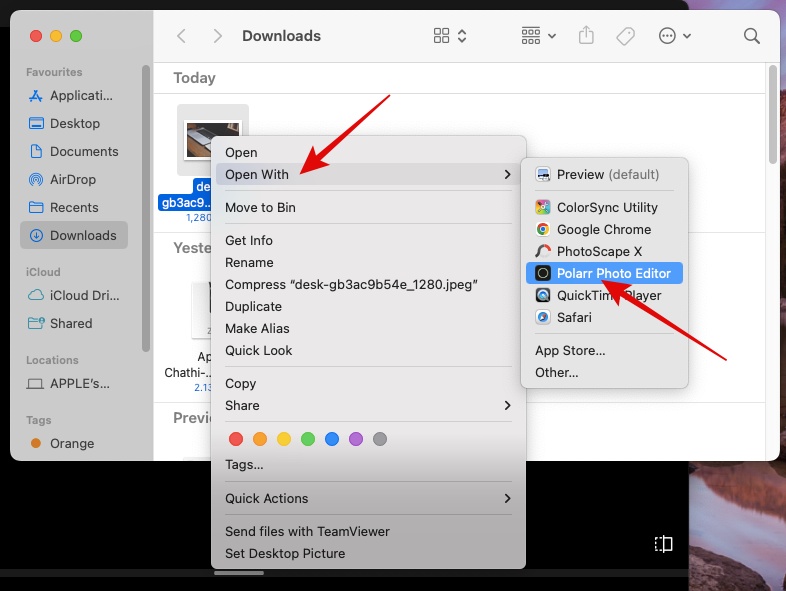
Step 2- Go to “Open with Polarr” and it will open the screenshot in the Polarr Photo Editor.
Step 3- Click the “Crop” option.
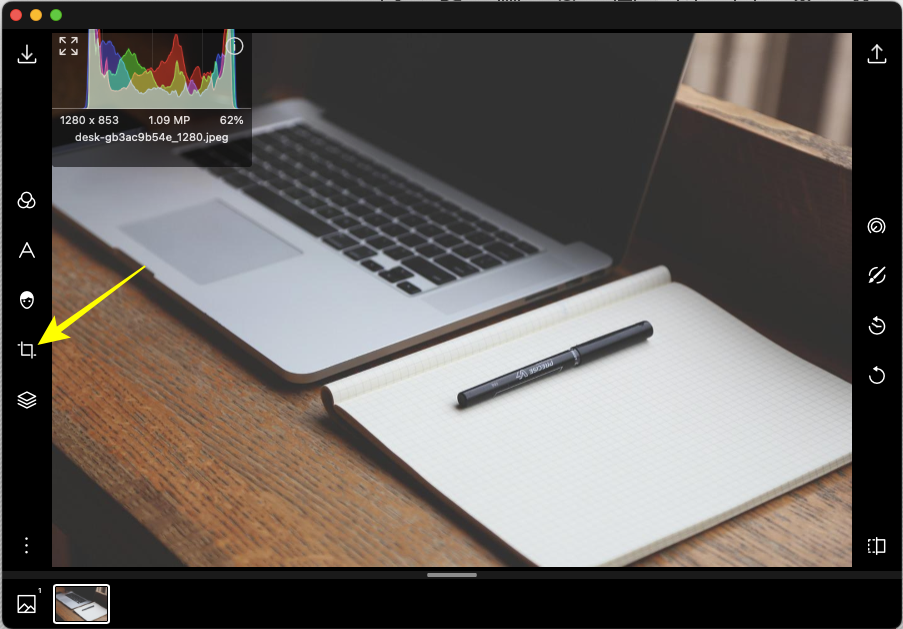
Step 4- Select the area you want to crop.

Step 5- Click the “tick” option from the left-hand side menu and the screenshot will be cropped.
Frequently Asked Questions (FAQs)
How Can I Take a Screenshot on a Mac?
What are the Keyboard Shortcuts for taking a Screenshot?
How to Crop a Screenshot on a Mac?
Where does the screenshot save, I need to use the Photos app.
What are the trusted third-party cropping apps?
Also See: How to Screenshot on HP Laptop or Desktop Computer