
Snapchat keeps crashing, Snapchat not working, and Snapchat stopping working is some of the most common problems that iPhone users report frequently these days.
Table of Contents
Although, according to the creator of the App, there is no bug as such that is causing these kinds of errors.
However, we have noticed these kinds of errors are generally linked to the shortage of internal memory of the device or if you are connected to a network through a VPN.
The other possible reason for Snapchat keeps crashing issue could be the corrupt app files, system files, or any critical file being accidentally deleted.
So, there is no single reason as to why this happens, but we have shared different solutions that will help you fix this problem.
Some of these solutions are very simple as restarting your device, while some of them require little attention.
Snapchat is one of the most popular social media apps of its kind that let you share snaps with your contacts that disappear after a short period of time from the receiver’s phone.
This is the basic function of this app. Though the creators are very aggressive towards updating the app with new features.
ALSO SEE: How To Take Screenshots on Snapchat Without Them Knowing?
Some people have reported Snapchat Not working problem after the recent update as well.
So if your iPhone doesn’t meet the recent update’s minimum hardware criteria or the iOS version is not compatible with the latest update, you may encounter this error.
Get Prepared to Fix Snapchat not Working:
Before we go ahead and try solutions to fix Snapchat not working problem, you need to make sure of the following things.
Once you are sure everything below is done properly and your Snapchat app still not working, you can move on to the solutions.
- Your Wi-Fi connection is stable and has fairly good internet speed.
- If you are on Mobile Data, make sure it is working fine.
- Go to the DownDetector website (Search in Google) and check if Snapchat’s server is working fine and if there is no outrage. You can reach out to Snapchat support on Twitter as well to know if the app servers are up and running.
Fix:1- Force Quit Snapchat and Re-launch it
When you have too many apps opened in one go, there are chances that two more apps clash with each other and cause the apps to become unresponsive. The same thing can happen here as well.
If you are listening to music, and sending emails at the same time, and suddenly you thought about sharing a snap with your friend, you may encounter a Snapchat Not working problem because using too many apps at the same time or if you have too many apps running in the background (including those that are not in use currently) can cause apps clash.
This problem can be fixed by closing all the apps including Snapchat and relaunching them.
Here is how to force quit Snapchat.
Step:1– Swipe up on the Home Screen (iPhone without Home button) & Double Tap the Home Screen (iPhone with Home button)
Step:2– It will preview all the apps currently active on your iPhone, go to Snapchat and Swipe up to close it.

Step:3– Do the same for other apps as well.
Step:4– Go to App Library and re-launch Snapchat App and see if the problem is fixed.
If the problem is not fixed, try the next method.
Fix:2- Restart your iPhone
If force-quitting your iPhone doesn’t work, restart it. It will restart all the processes running in the background which probably causes Snapchat not working problem.
Even if we force quit the apps, there are many services and processes required to be running for the functioning of your iPhone.
Restarting the iPhone will restart all the services/processes and may resolve this problem.
Fix:3- Update Smartphone System
If your smartphone operating system is not updated, you may face this problem frequently. Not just Snapchat wouldn’t work, but the other apps/widgets also may not work properly.
Every new update comes with bug fixes and the addition of new features that may not work with the outdated version of the app or vice versa. Hence updating the operating system sometime resolve this problem.
ALSO SEE: How to get Dark Mode on Snapchat?
Before you go ahead with the update process, make sure you are connected to a reliable and fast Wi-Fi network so that the update is downloaded and installed properly.
Also, make sure your phone has sufficient battery backup as updating the operating system will require time as a lot of processes will run.
Your iPhone may be required to be restarted a few times before the update gets completed.
NOTE: Take a backup before you update the operating system
Once you have both things in place, go ahead and update the operating system here.
Here are the steps.
Step:1- Go to Settings.
Step:2- Then to General.
Step:3- Then tap “Software Update”
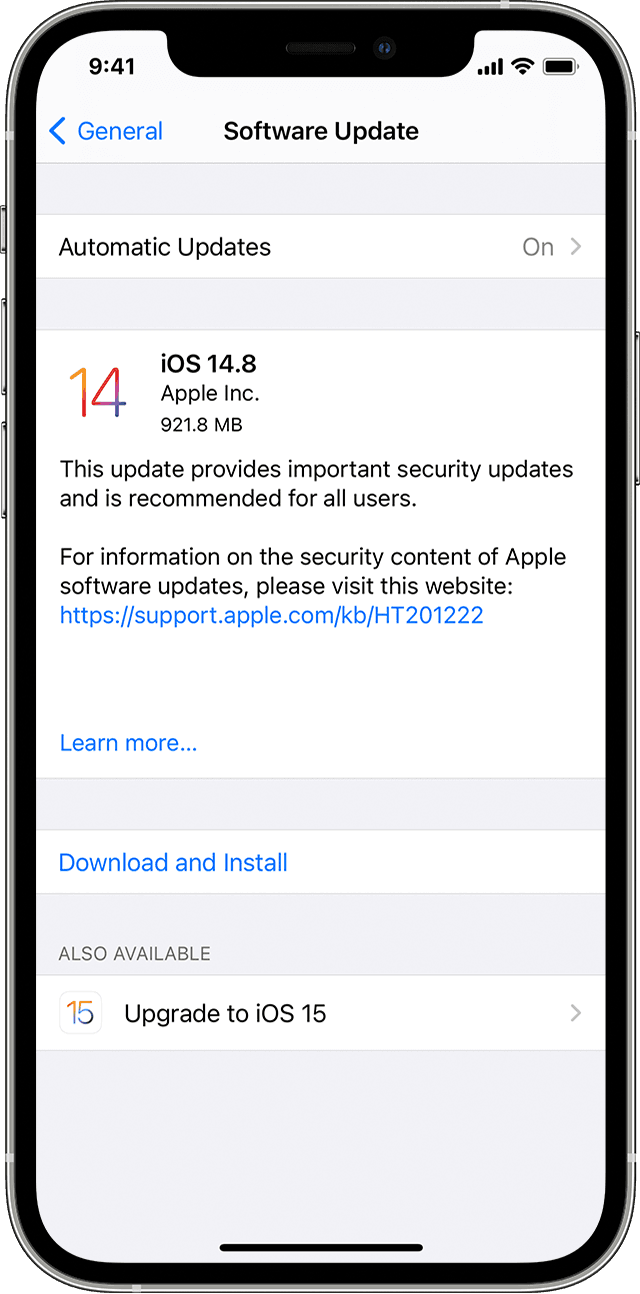
Step:4- You’ll see the update (if any). Click “Download and Install”.
Step:5- Let the download gets completed. Enter the passcode and let the installation gets completed.
Launch Snapchat and see if the problem is fixed.
Fix:4- Update Snapchat App
One of the most prominent reasons why Snapchat keeps crashing could be the outdated version.
If you have not updated Snapchat to the latest version, there is a high chance you face this issue. You could fix the problem by updating the Snapchat app.
So check whether you are still using the old version, or if the App is automatically updated.
Every new update comes with bug fixes to make the app work well across all kinds of devices including the iPhone.
Here is how to update Snapchat on iOS 13 & Later and iOS 12 & Before.
Update Snapchat on iOS 13 or Later
If you are having iPhone that has iOS 13 or later, follow these steps to update Snapchat:
Step:1- Open the App Store. If you are not logged into to App store, make sure to do it. You can log in to the App Store on your iPhone with your Apple ID Password.
Step:2- Click on the profile icon that you can find in the top right corner of the screen. If you have updated your photo, you’ll see it in a circle. That’s your profile icon. Click it.
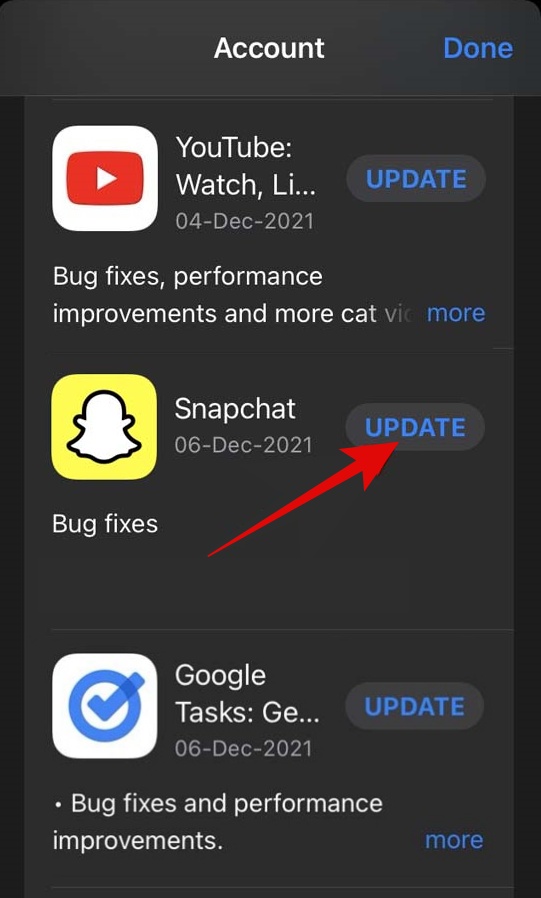
Step:3- It will populate a list of apps that have been installed on your iPhone. Scroll down to find Snapchat.
Step:4- Click the “Update” button to update Snapchat. It will take some time to download and install updates.
Step:5- Once the update is done, the “Update” button will change to “Open“. Hit the “Open” button to launch Snapchat directly from your Profile.
Check if the problem is fixed. If not, try our next method.
Update Snapchat on iOS 12 or before:
If you’re using iOS 12 or before, these are the steps to update Snapchat.
Step:1- Open Apple App Store from the Home screen.
Step:2- Tap the “Update’ icon on the bottom right corner of the screen.
Step:3- You can look for Snapchat and click “Update” or you can hit the “Update” button there only to update all the apps.
Step:4- Enter the password if needed and let the update process get completed.
Fix:5- Clear Snapchat App Cache
If you have not deleted the Cache for a very long time, there is a high chance that the pile of data causing Snapchat not working problem.
It is recommended to clear cache/clean app data whenever you feel the apps are behaving strangely.
Clearing Cache files will not only help in running the app smoothly but it will spare some internal memory on your iPhone.
Here is how to clear the cache on your iPhone.
Step:1- Open Snapchat on your iPhone.
Step:2- Go to the Profile icon in the Top Left corner. If you have a picture updated for your profile, you’ll see your picture.
Step:3- Click the gear icon (settings) at the top right corner.
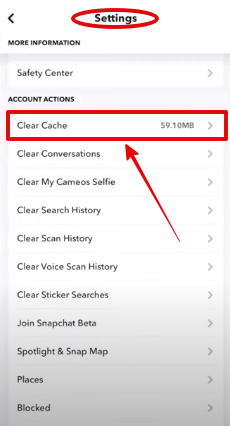
Step:4- Go to “Account Actions”
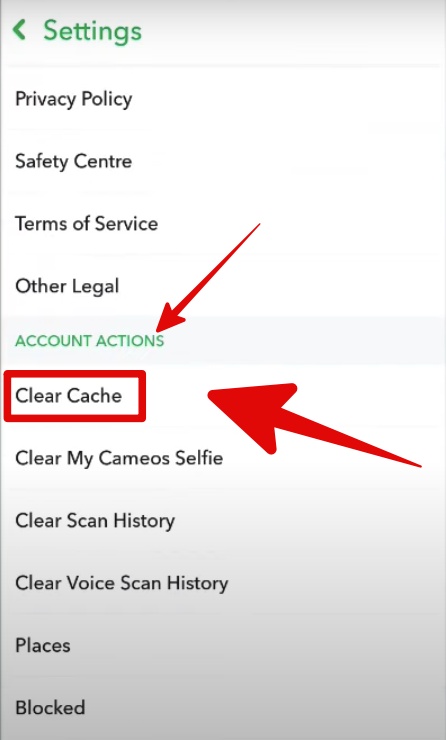
Step:5- Then tap “Clear Cache”. You will see how much space the cache has occupied on your iPhone.
Step:6- It will prompt whether you want to clear all cache. Tap “clear”
Step:7- It will take some time to clear the cache, once done click “Okay” to start Snapchat. If it doesn’t get restarted, close the app manually and launch it again.

Check if Snapchat not working problem is fixed. If not move on to the next fix.
Fix:6- Disable VPN Service
If you are using any VPN service on your iPhone, it may create problems communicating the app with an internet connection.
Apart from some of the best VPN services, other offers very low internet speed that could cause Snapchat not to respond or Snapchat not working problem.
Try to disable VPN from your iPhone and check if the problem is solved.
- Go to Settings.
- Then General.
- Then VPN and Device Management.
- Then head over to VPN.
- Then disable VPN services.
- Launch Snapchat and see if the problem is fixed.
Fix:7- Remove the Snapchat-related Apps
If you have installed any app recently to make friends on Snapchat or apps for filters/lenses, uninstall them as they may be causing Snapchat to become non-responsive.
These kinds of apps clash with the Snapchat app system files, sometimes corrupting them.
Here is how to remove them.
- Find the app that you want to remove.
- Long-press the App.
- Remove App.
- Delete App
- It will delete the app. Launch Snapchat and see if it’s working fine now.
Fix:8- Remove Snapchat and re-install
If none of these solutions works, the last resort is to uninstall the Snapchat app and install it again.
This is the best solution in most cases as deleting the app will remove all the cache, and app data from the phone.
Reinstalling Snapchat again will download the files again and probably fix this problem.
It is one of the safest solutions not just to resolve this problem but to other problems as well.
As it starts over everything and fixes the problems automatically.
WARNING: You will lose your Snapchat data if you delete the Snapchat app. Proceed only if you have taken a backup or don’t bother about losing Snapchat data
- Long-press Snapchat.
- Select “Remove App“
- Tap “Delete App” and let Snapchat get deleted from your iPhone
- Go to App Store, and find Snapchat.
- Install the app now. It will take some time before it is installed.
- Launch the app, sign in with your credentials, and check if it is working fine.